As I’ve written about before (and in my Presto Sketching book!), storyboards give you great bang for buck when you want clarity and direction in any project, especially for product and service design. Here’s how to construct the most essential ingredient: the story itself.
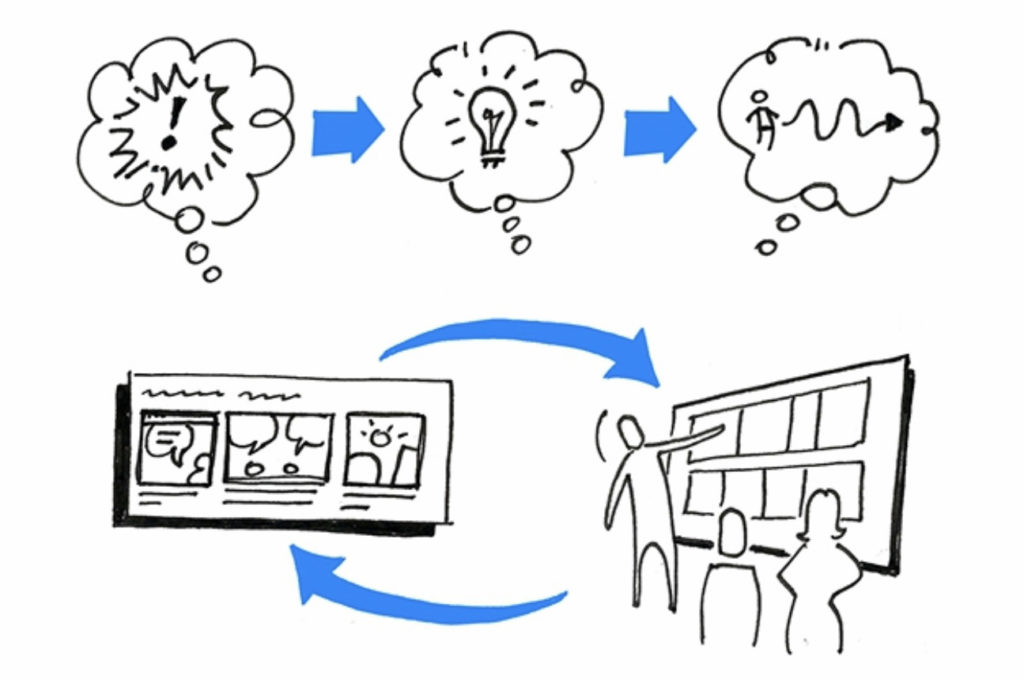
Storyboards can guide you and your team from problem to solution to experience to execution. They serve as explainers for an existing experience (e.g. a customer experiencing a problem), or as prototypes for a future experience (a customer achieving their goal using a solution). And by ‘drawing it out’, you can spot gaps in your thinking, and invite more effective feedback from team members and stakeholders alike.

Get your story straight
Whether you’ve never drawn a storyboard before, or you’re a seasoned veteran, it can be daunting to put pen to paper, let alone show your storyboards to others!
Never fear.
The most fundamental element of a successful storyboard is not the actual drawing. It’s the story itself. I’ve seen storyboards that weren’t that useful, even though they were sketched by people who are ‘good at drawing’, because the story didn’t make sense.
It’s the story that joins all the frames together. It’s the story makes your audience care. It’s the story that feeds their curiosity, sparks imagination, and keeps them reading to find out what happens next.
Don’t go on the Hero’s Journey
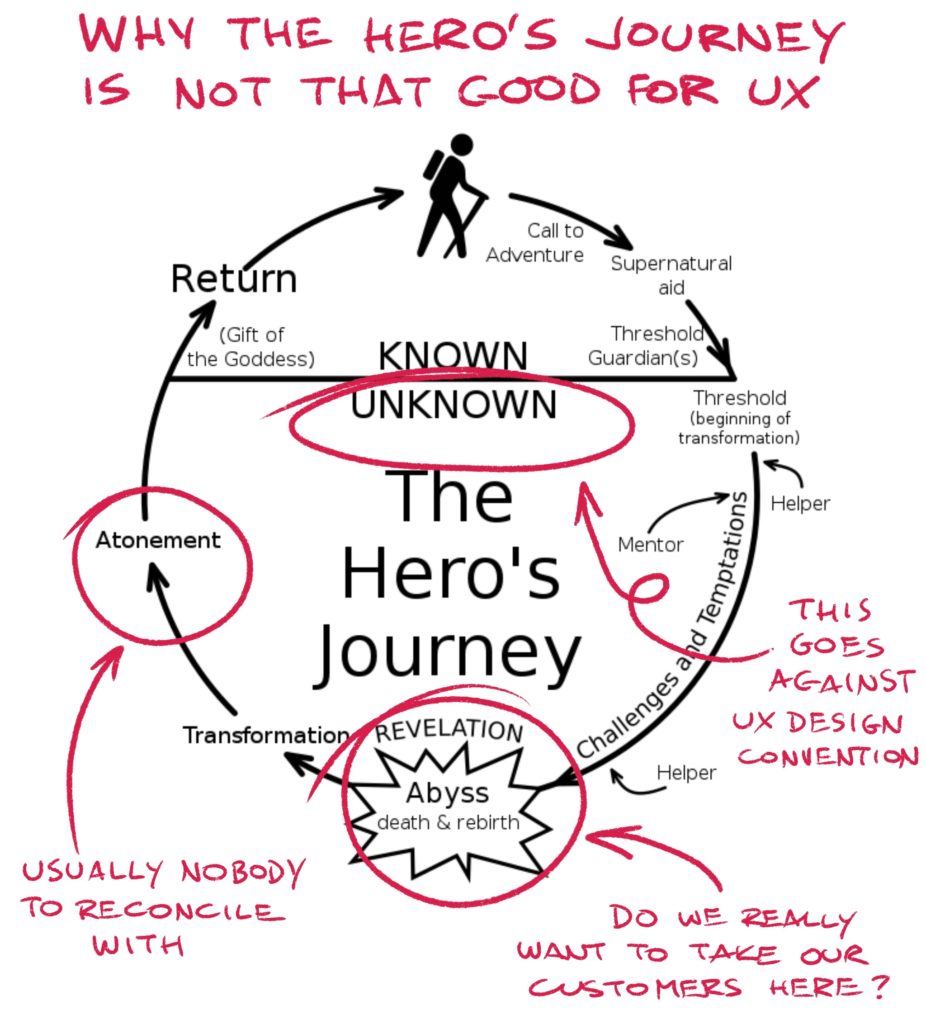
As a designer, I was taught the Hero’s Journey story format, the Monomyth by author Joseph Campbell, in his book The Hero with a Thousand Faces. On one level, it’s easy to see how you can use it as a way to tell your customers’ stories: by casting your customer as the hero, you can then illustrate a challenge they’re up against, and your solution as the Helper or Mentor.
Even when I first tried to apply it, I found it problematic. For a start, the way of using it I just described ignores most of what’s actually on the Hero’s Journey, including the whole point of it: the Hero returns not only conquering whatever Enemy needed conquering, but a transformed version of themselves. That’s what makes so many stories so endearing. Plus, do we really want our customers to go through the Abyss, and Atone for their mistakes…?

And that’s only the start of it. It’s been rightfully claimed that when Joseph Campbell combed through the stories of all ages and cultures to derive a single Monomyth, he basically cherry-picked what already fit the prevailing cultural narrative of the ‘rugged individualist’. In this way, what he did was falsely reductive and colonialist.
Also: is conquering enemies – even metaphorical ones – the only way to resolve things? What about collective experiences, rather than individual ones?
If you want to pen the next Star Wars or Lord of the Rings, go for it. But I think our customers’ and communities’ stories deserve better.
The Freytag story arc
There’s no doubt that stories of challenge and achievement have a huge pull on us, and it’d be rude if I didn’t mention the arc from Gustav Freytag’s book Technique of the Drama. Freytag rationalised stories into 5 acts: exposition, rising action, climax, falling action (or final suspense and resolution), and denouement (conclusion).

This might work well for the story you want to tell, but it always still fell short for me. Being mad keen on storyboarding my entire design career, and wanting to find a repeatable successful story framework that worked for me, my team, and other design teams, I extracted the best of what I could from these two and made my own narrative structure:
The Presto Sketching story structure
This story structure is purpose-built for product and service teams, but also works for change management projects as well, where you need to show an experience that involves either a problem with a negative impact, or a solution with a positive benefit.
And it goes thus:

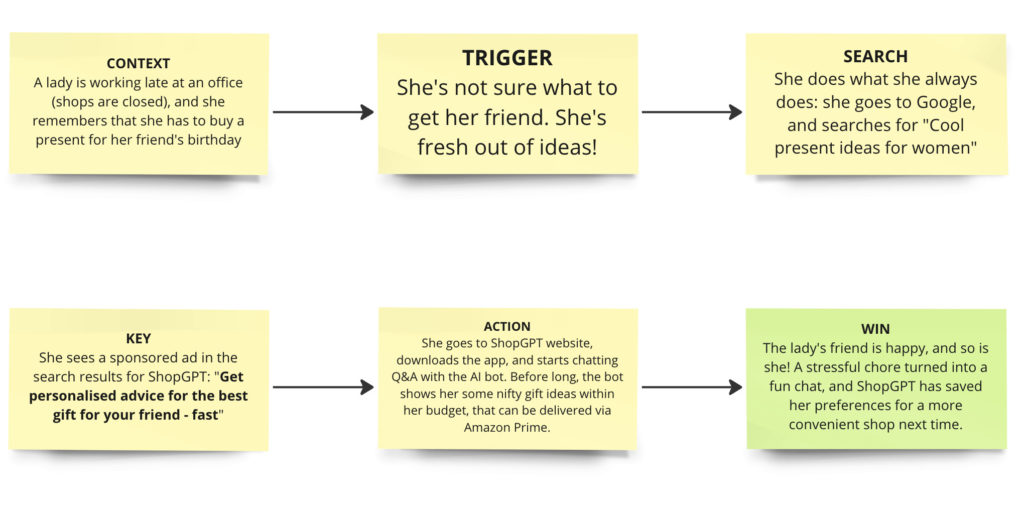
I’ve done a screenshot of these stickies in Miro, to show that you can construct your story using words and simple sticky notes, whether real sticky notes, or digital. Let’s take a look:
- CONTEXT – Set the scene. Who is the story about? Where is this character or protagonist? Why are they there, or what is their goal? This helps your audience to know exactly what’s going on.
- TRIGGER – Show the motivation. What is the unmet need or problem? Without this, it’ll be hard for your audience to care about what’s going on.
- SEARCH – Wind up your character, and let them go. What does your character do first (and do next), to try to solve their unmet need or problem?
- KEY – Show what’s new. What’s the main feature or change that unlocks success from here on in?
- ACTION – Let your character go again. What do they do next, that involves the feature or change that they have found?
At this point, your story structure will be different depending on what you intend to show:
- WIN – Show the achievement. What’s the end-game, or benefit? How does your character achieve their goal? OR
- LOSS – Show the frustration. What’s the negative impact? What is your character left with?
How to use this Presto Sketching story structure
You can use this structure as a way to synthesise and translate the various elements you have into a visual story that your audience can read and act on, based on the 6 ‘stages’ listed above.
Step 1: Set your goal
Decide what the goal of your story is going to be. This includes:
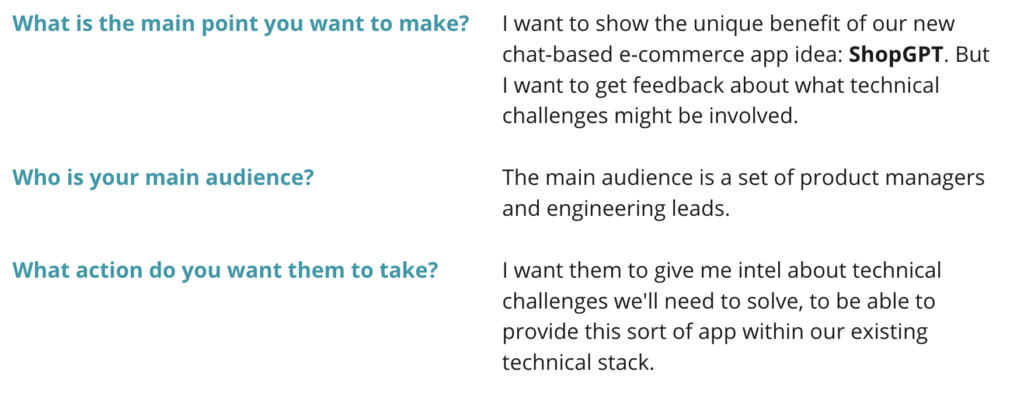
- What is the main point you want to make with your story (and then storyboard)? Is it to explain a situation that needs attention/fixing? Is it to show a new idea in action?
- Who is your main audience? What is their perspective on the subject of this story? How close or distant are they to the subject matter? What’s in it for them?
- What action do you want them to take? As pleasant as it will be for people to read your story/storyboard, there needs to be a clear point to it. Do you need to raise awareness? Clarify and educate? Get them to empathise? If so, why? Do they need to make a decision of some sort?
Example:

Step 2: Gather your material
You’ll probably need some material to translate into your story. This could include:
- Customer interviews, survey responses, customer quotes, personas/archetypes, and other authentic user research and analysis
- Product/service usage data
- Existing journey maps and service blueprints
- Existing or new ideas for user interfaces, processes, other other aspects of the experience or change you area designing
- Existing or new product/service ideas, and ideas for how your customers/employees will use them
Step 3: Get 6 sticky notes
Whether you use physical or digital sticky notes is up to you. Both are quick and cheap to use.
Step 4: Get writing
Label each of the 6 sticky notes with the stage names above (including whether you choose WIN or LOSS). Then, try to write a succinct sentence describing each stage. Note: one stage doesn’t have to equal one scene in your storyboard; it might end up being one frame or several frames. That doesn’t matter right now.
Example:

Set yourself up for storyboarding success
Congratulations! Now you have the bones of your story. You have a sound, logical structure that has a beginning, middle and end, and that unites the various essential elements into a coherent whole.
From here, you’re ready to draw your storyboard. This can take several forms – office paper, large long gallery-style sheet of paper, PowerPoint slides, Miro canvas, you name it – but now you have a story that you can tell, and you can adapt to any of these media.
…and drawing the storyboard will be the subject of another blog post. 😉
So, what do you think of this structure? Try it out. I’m interested to know how it works for you, and how you might adapt it for your team and your project.